Building The Foundation
- mollybydesign
- Jul 31, 2019
- 2 min read
ANNOUNCEMENT: Now begins the construction pictures!
Yes, it is time to embark on the photo documentation of our journey. First up: FOUNDATION. Lots of pictures and videos below to help explain the process!
After walking the property, marking, clearing, walking the property again, and staking, you FINALLY get to start on the "REAL" construction of the house.
The first part of this is going to be the placement of where the footers are going to go, digging out the footers, and pouring the concrete. We didn't have much say in this - it's just all to specifications.
However, the next part, the foundation, we had options; scroll to the bottom to see our ultimate decision. And we're including a cost-savings tip here, too!
Footers
Exactly what it looks like! After walls/corners are marked and depth pegs (using rebar) are installed, it's time to pour the concrete. Check out that pump truck they had to bring in to do this. We've seen some pretty cool stuff during this process... including getting that huge pump truck unstuck from our soggy driveway!
Foundation choices:
As shown in the pictures below from left to right:
Stone
Brick
Parged


If you have a basement, you may also choose to opt for the pre-cast foundation walls system.
Pre-Foundation

This part involves a lot of cinder blocks! This is how your foundation will be built from the ground up.
Your brick mason/foundation person will take your selections from above and use block/mortar/brick/stone to build your foundation. There are minimal heights that typically have to be reached (for things like termite protection) and the slope of your land determines the rest of the foundation height.
Foundation Day 1

Let the work commence! These guys were GREAT (Richmond Masonry Co) - we still can't believe what they were able to accomplish in the very first day.
Foundation Day 2
Our Decision / Cost-Savings Tip
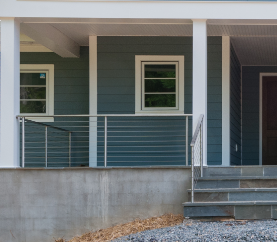
If you're like us and trying to save money, you do NOT have to put brick/stone all the way around your house. Simply placing it on the front only (or the front and side that will be seen the most) can have a huge cost savings for the rest of your home. Remember, plantings may cover a lot of it, anyway - so make sure you consider your future landscaping plan.
In our case, we were originally doing parging all the way around. However, we received a call from our mason, who explained, "It really isn't going to be as expensive as you think to put brick on your front foundation, since there isn't a lot of exposed area (it doesn't go on under your porch), and the piers on the front of your porch will look a lot better with it!"
So, we decided to go with brick on the front and the garage side, as these are sides will be the most frequently visited. Remember, the entrance to mollybydesign is on the left side of our home, over the garage! We are so THANKFUL that we followed his lead on this one! It made a huge difference.


Comments